Making of Kallias Doll
Over the past 6 years of my dedication to the Greeks, I’ve always felt myself longing to get closer to them… But I was unsure how since I was just a simple annually visiting teenager. This was until I got the brilliant idea of making a doll for my favorite character in 2021. This was around the time when my doll collecting hobby resurged as well.
It wasn’t until 2024 that I finally gained all the ingredients to make him, however. I had thought about a few dolls to use over the years before. But I eventually ended up choosing the doll… 1997 Doctor Ken (yes, my secret is out!!)
I chose him because of his unique look compared to the other kens at the time, something that wouldn't automatically say ‘Oh thats Ken!’ yknow? But his angular eyebrows and wispy eyelashes really sold me on the look, they also have the closest face out of the other dolls I was looking at. Modern dolls have really enlarged heads :/
But attau, doesn’t Kallias have black hair? There’s my other reason, when Doctor Ken’s hair is gel-ed or in darker areas, it looks brown-tinted black! Also, guy dolls are unfortunately not very popular with black hair… Since I don’t really trust my skills in short-haired rerooting, dark brown would have to do. (Maybe I’ll improve this later tho?)
When I got Doctor Ken in the mail, I was so excited that I started working immediately!! I didn’t even wash off the previous owner's surface dirt first too lol…..
Constructing the Doll
Before I could start, I had to learn how Kallias’ outfit was constructed, and eventually I got a clear pattern layout of his outfit! This helped me plan out what to buy and how to make it. I also laid out my supplies together before constructing them, just to make sure I had the right colors and that the lighting made them look good.
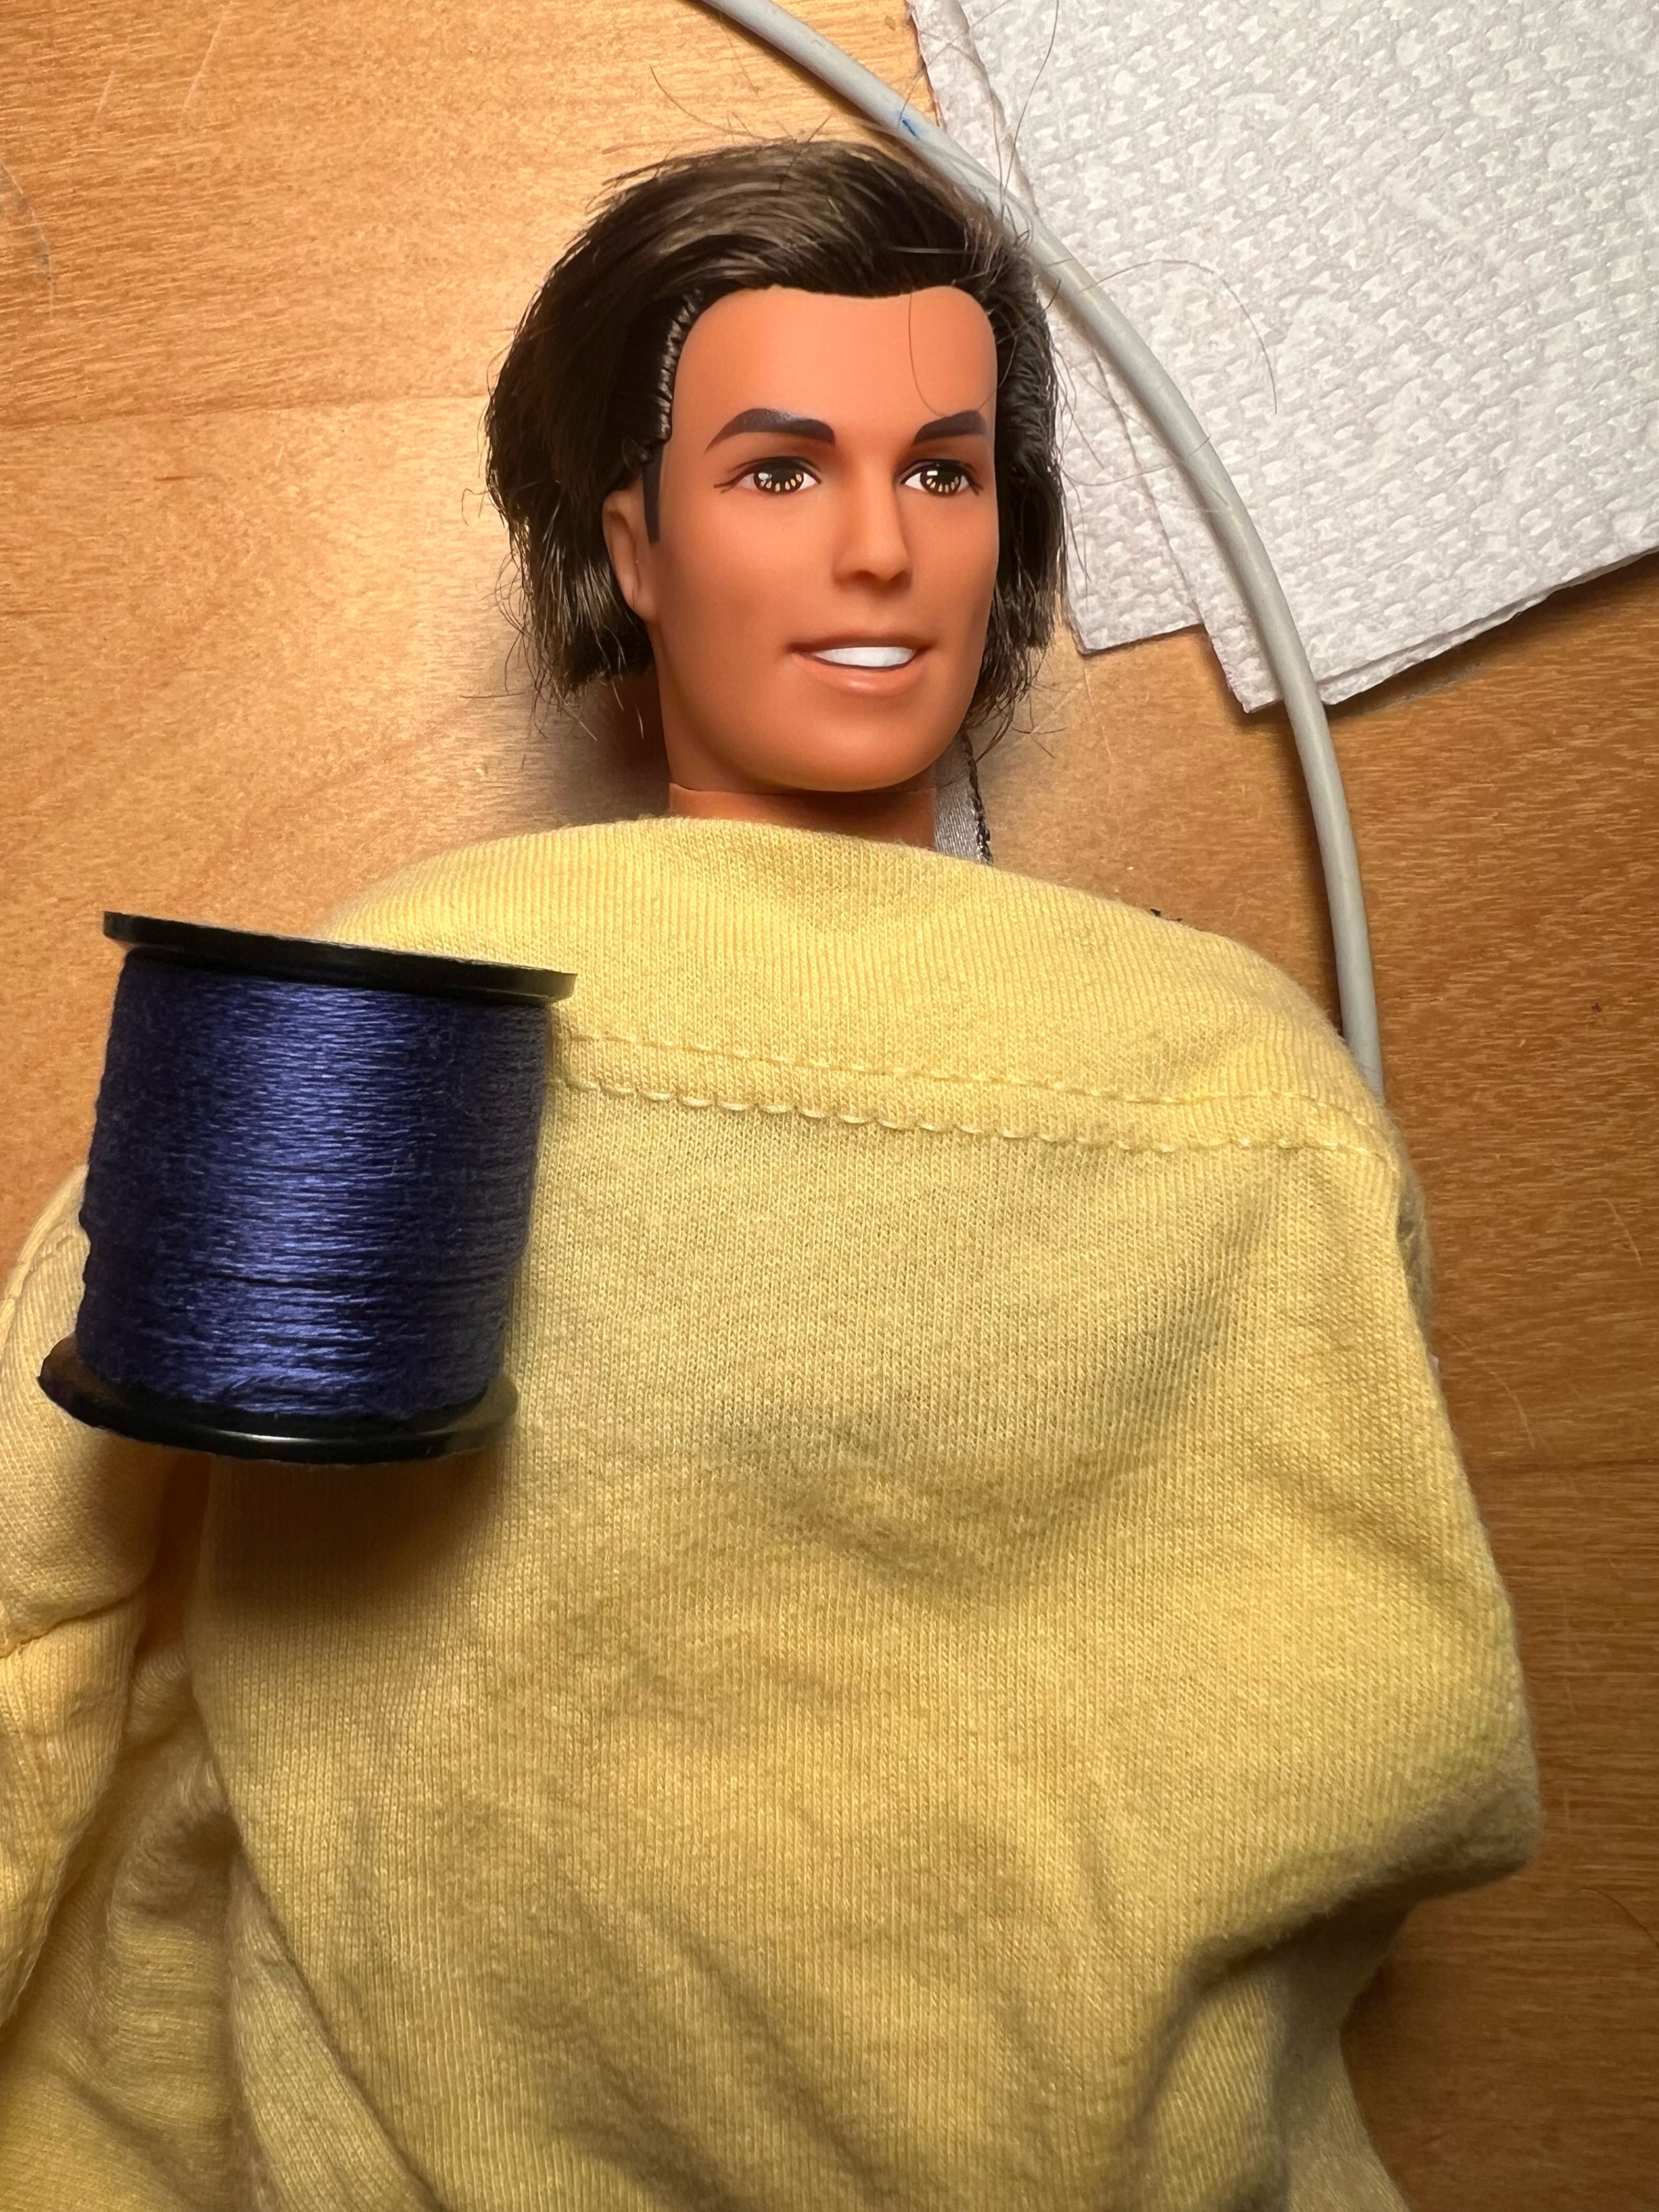
Starting with the chiton, I used an old t-shirt that my mom got me from Japan, it was a simple made-to-order looking shirt tho and It was too tight for me… So I used it in a better way, yet still sentimental. I tried to see if the hem of the t-shirt would be good for the top of the chiton, but it was too much, I used flat portions of the shirt instead.
After figuring out where to get my fabric from and confirming everything looking right, I patterned out the actual chiton from tissue paper. Of course, normal Chitons wouldve been one horizontal sheet folded around the body and clipped at the shoulders. This does not translate well in doll form for how Kallias’ chiton falls over his shoulders.
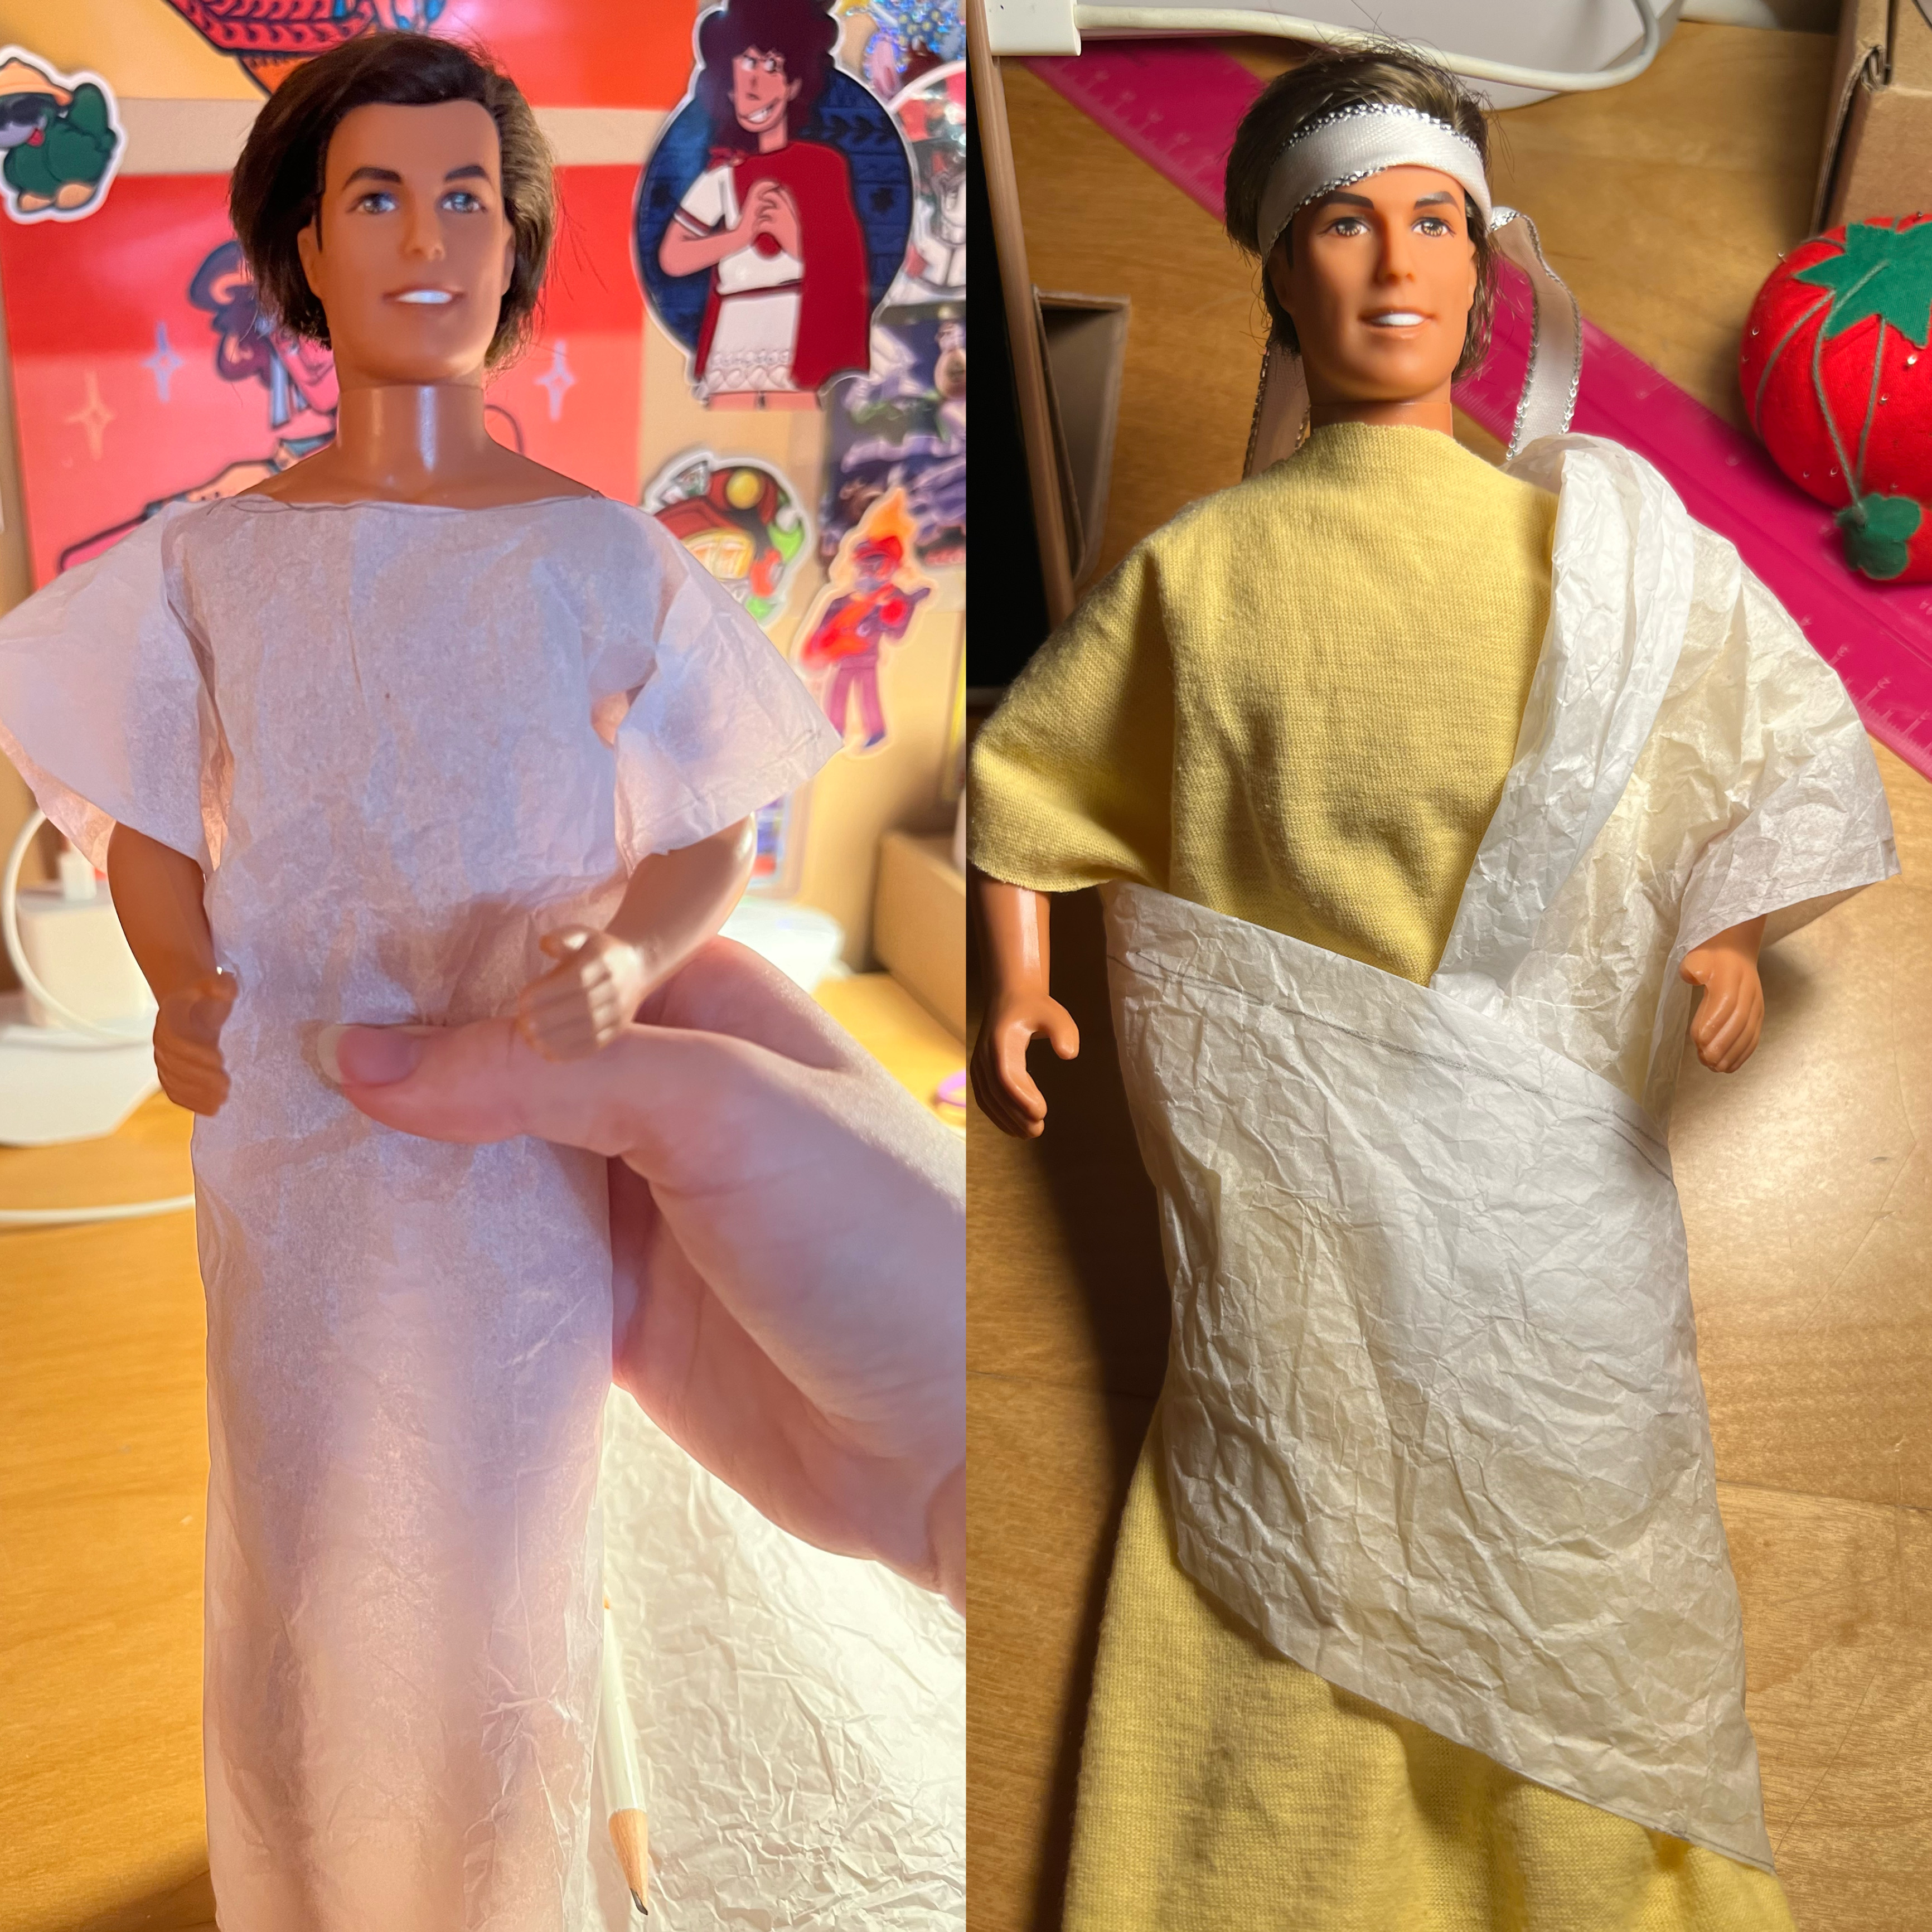
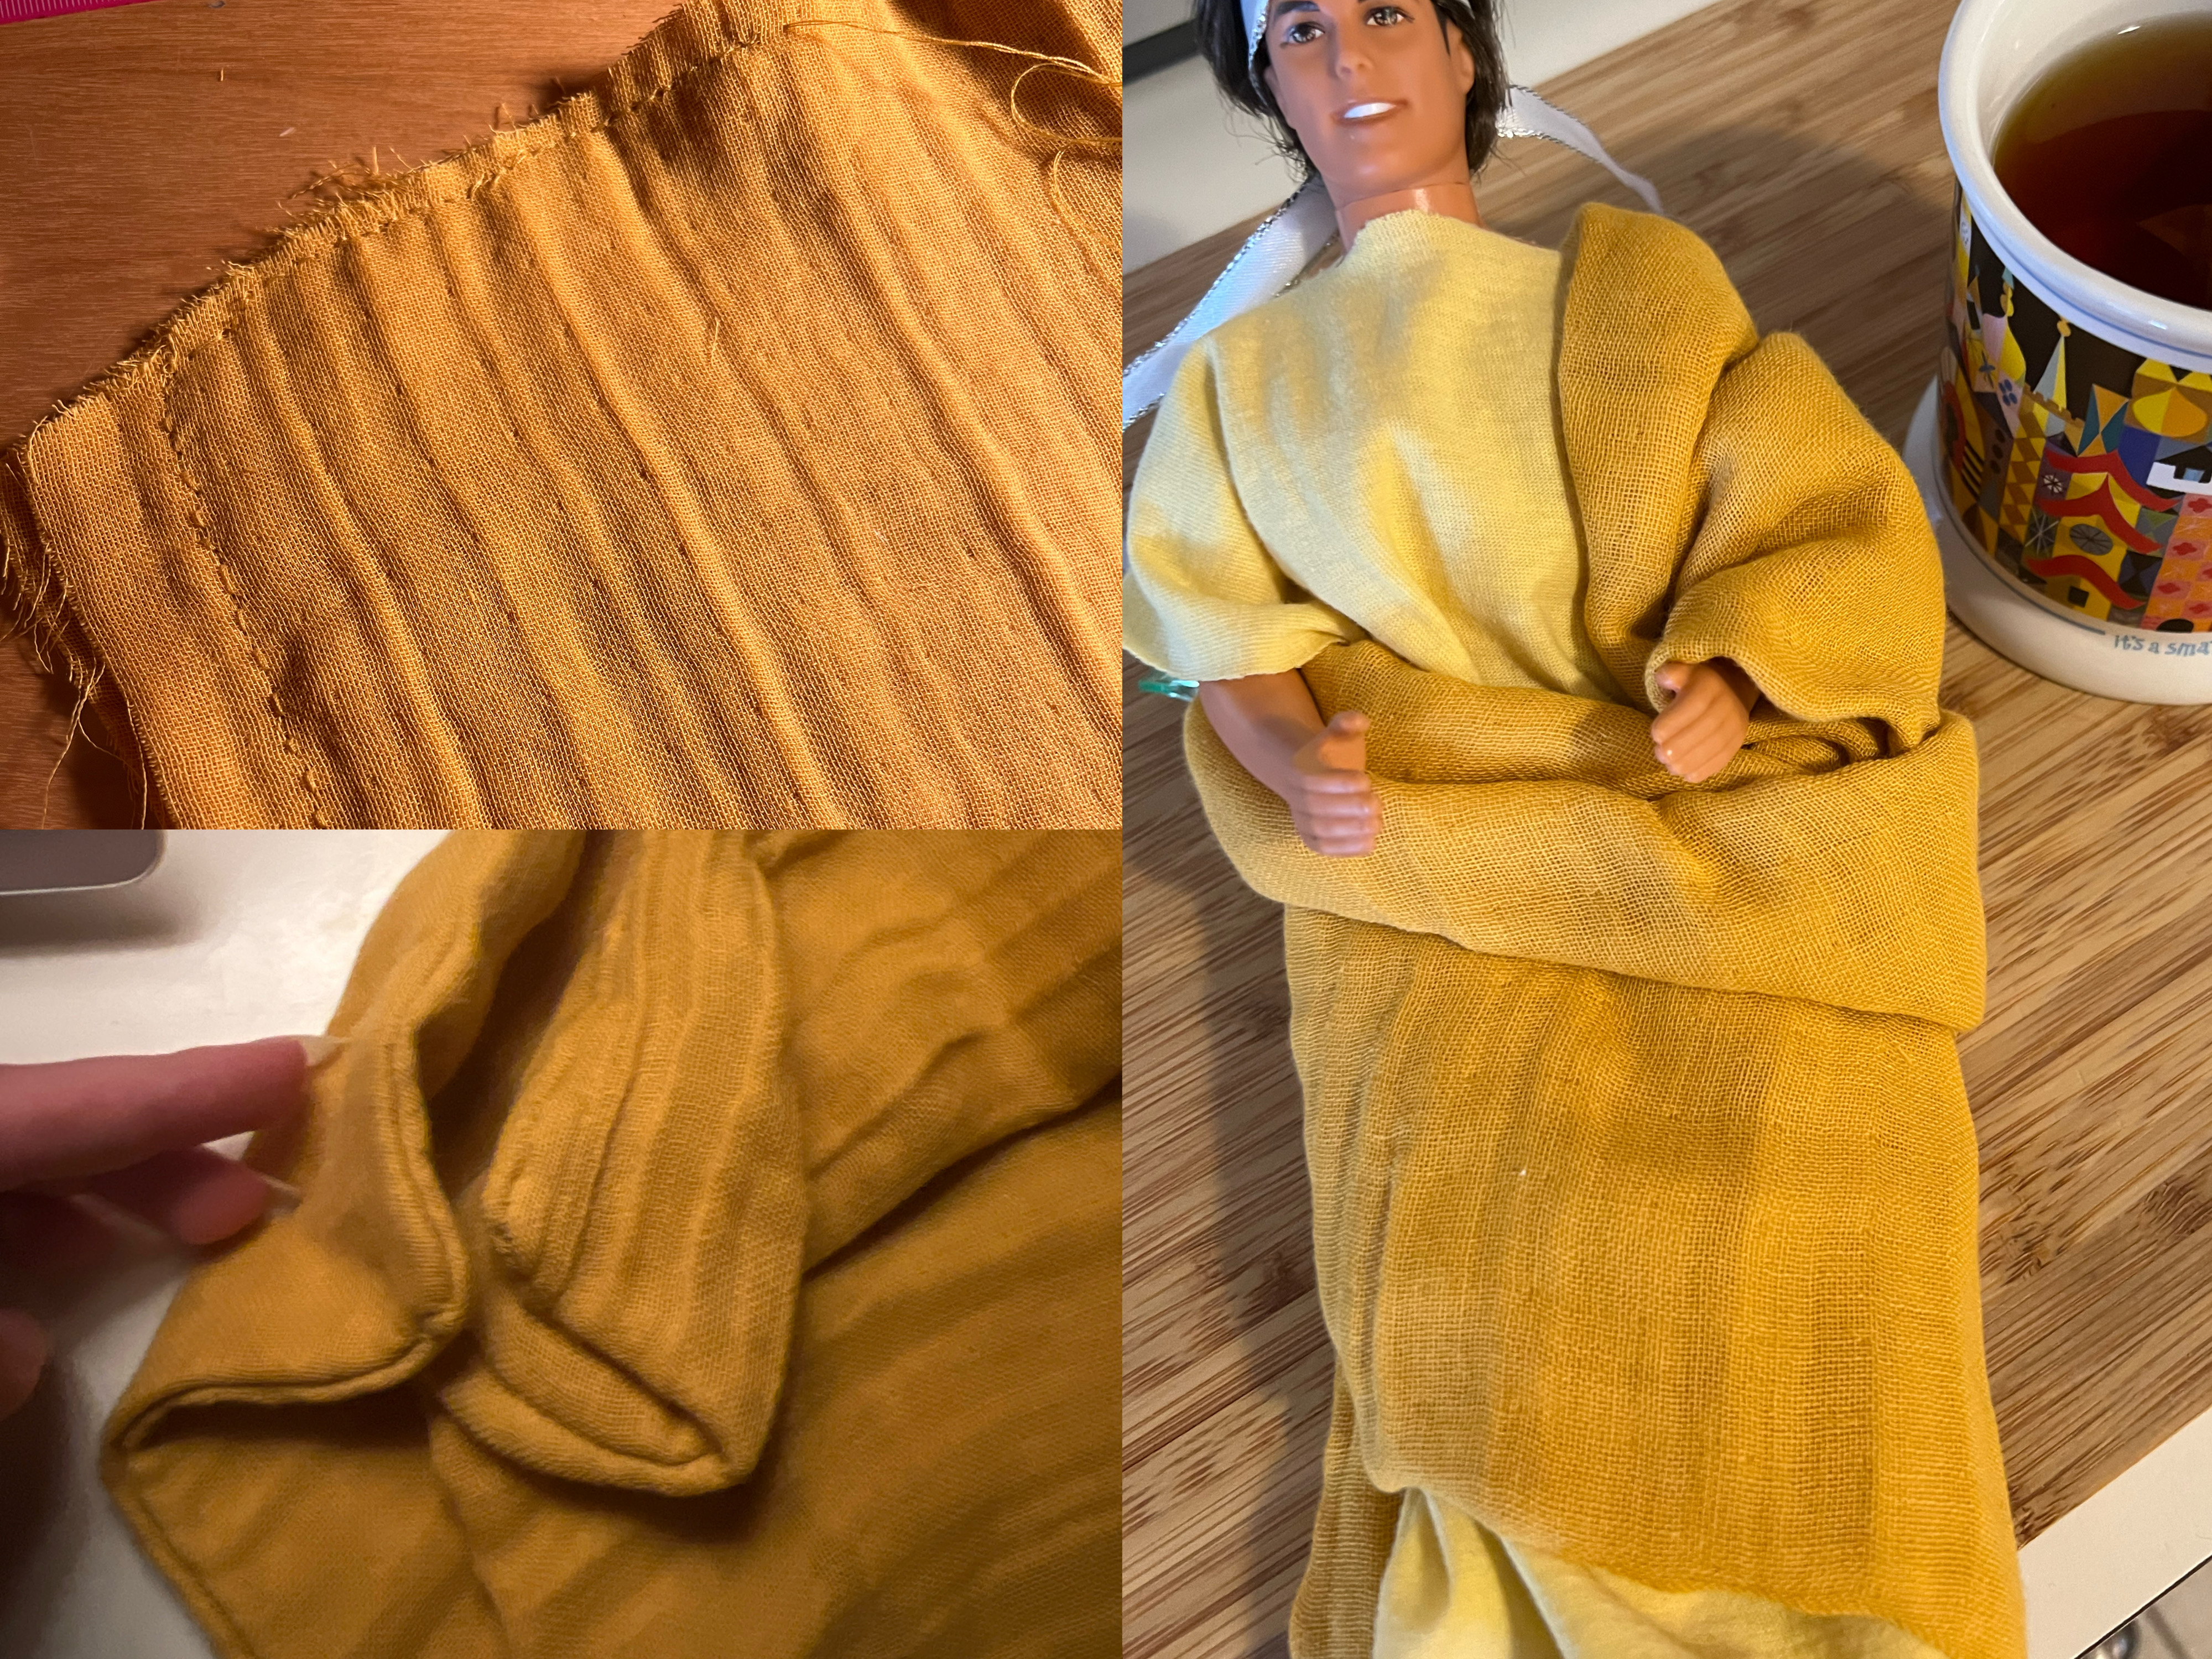
So I constructed it like a smock or poncho, the only hole between the shoulders being for the head, I ended up sewing the sides underneath his arms too, just for the added protection and not for historical accuracy lol!! I did the same with the himation, the outer wrapped garment and usually the first thing you think of when someone mentions ‘greek fashion’. With the patterns completed, I cut out the fabric pieces and modified as needed. The chiton was easy, just 2 sides of stitching and a hem for the bottom! But the himation had to be sewn like a pillow with no stuffing… Which added to the extra softness and ‘clean cut’ feeling.
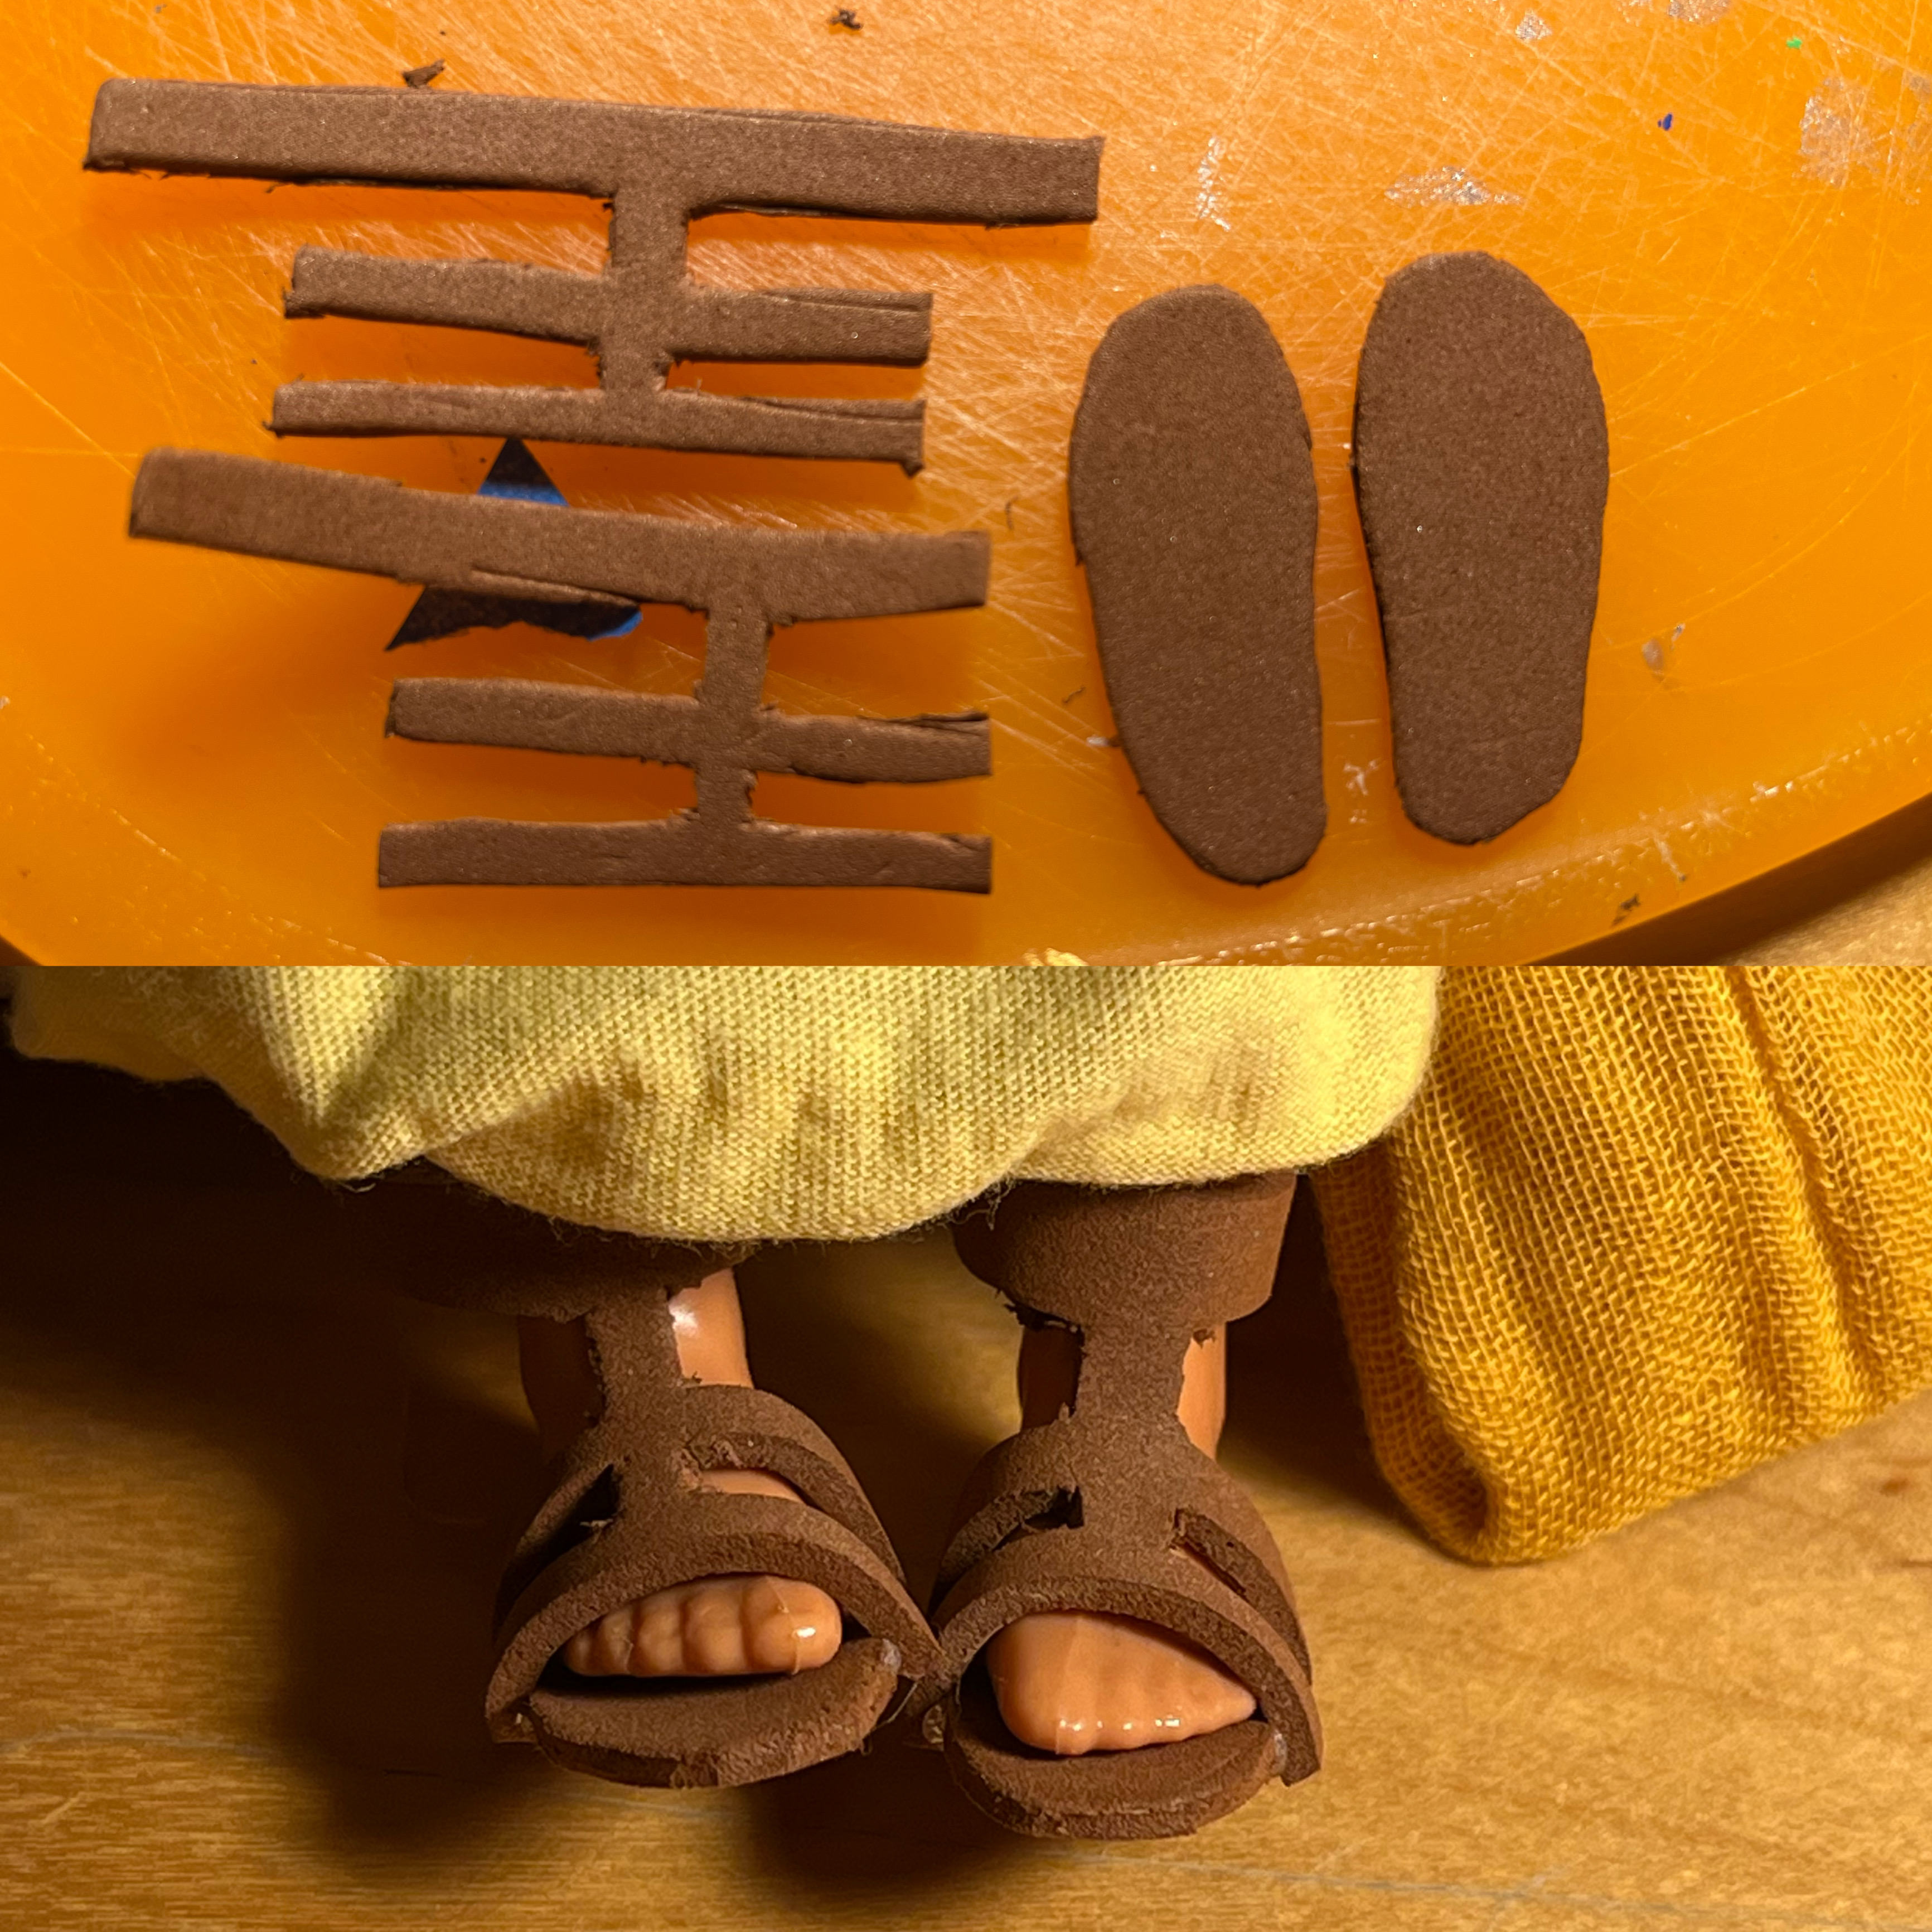
Next I worked on the shoes, which was very confusing at the time! I still mistook the back of his feet as extra shoe backings but ah whatever, it adds to the stability. I used a common cosplayer technique that I learned, using tape around the foot and stenciling it out with a pen, then flattening it and cutting out your custom made shape. I used hot glue to put it together since that’s my favorite choice of glue.
Then, after letting the hype of ‘omg i’m doing this!!’ die down a bit, I focused on the details of his chiton. I first did the threaded embroidery part, this was my first ever time embroidering btw! This was also the time of when I was on a mini lockdown cause I had no way of getting to school during a current family crisis, so I had lots of movies to watch while I embroidered! Yay! I watched: Tarzan 1984, Legend, Iphigenia (1977), Pee-Wee’s Big Adventure, Marie Antoinette, and Blue Velvet. Lots of good movies are on youtube for free if you know where to look!!
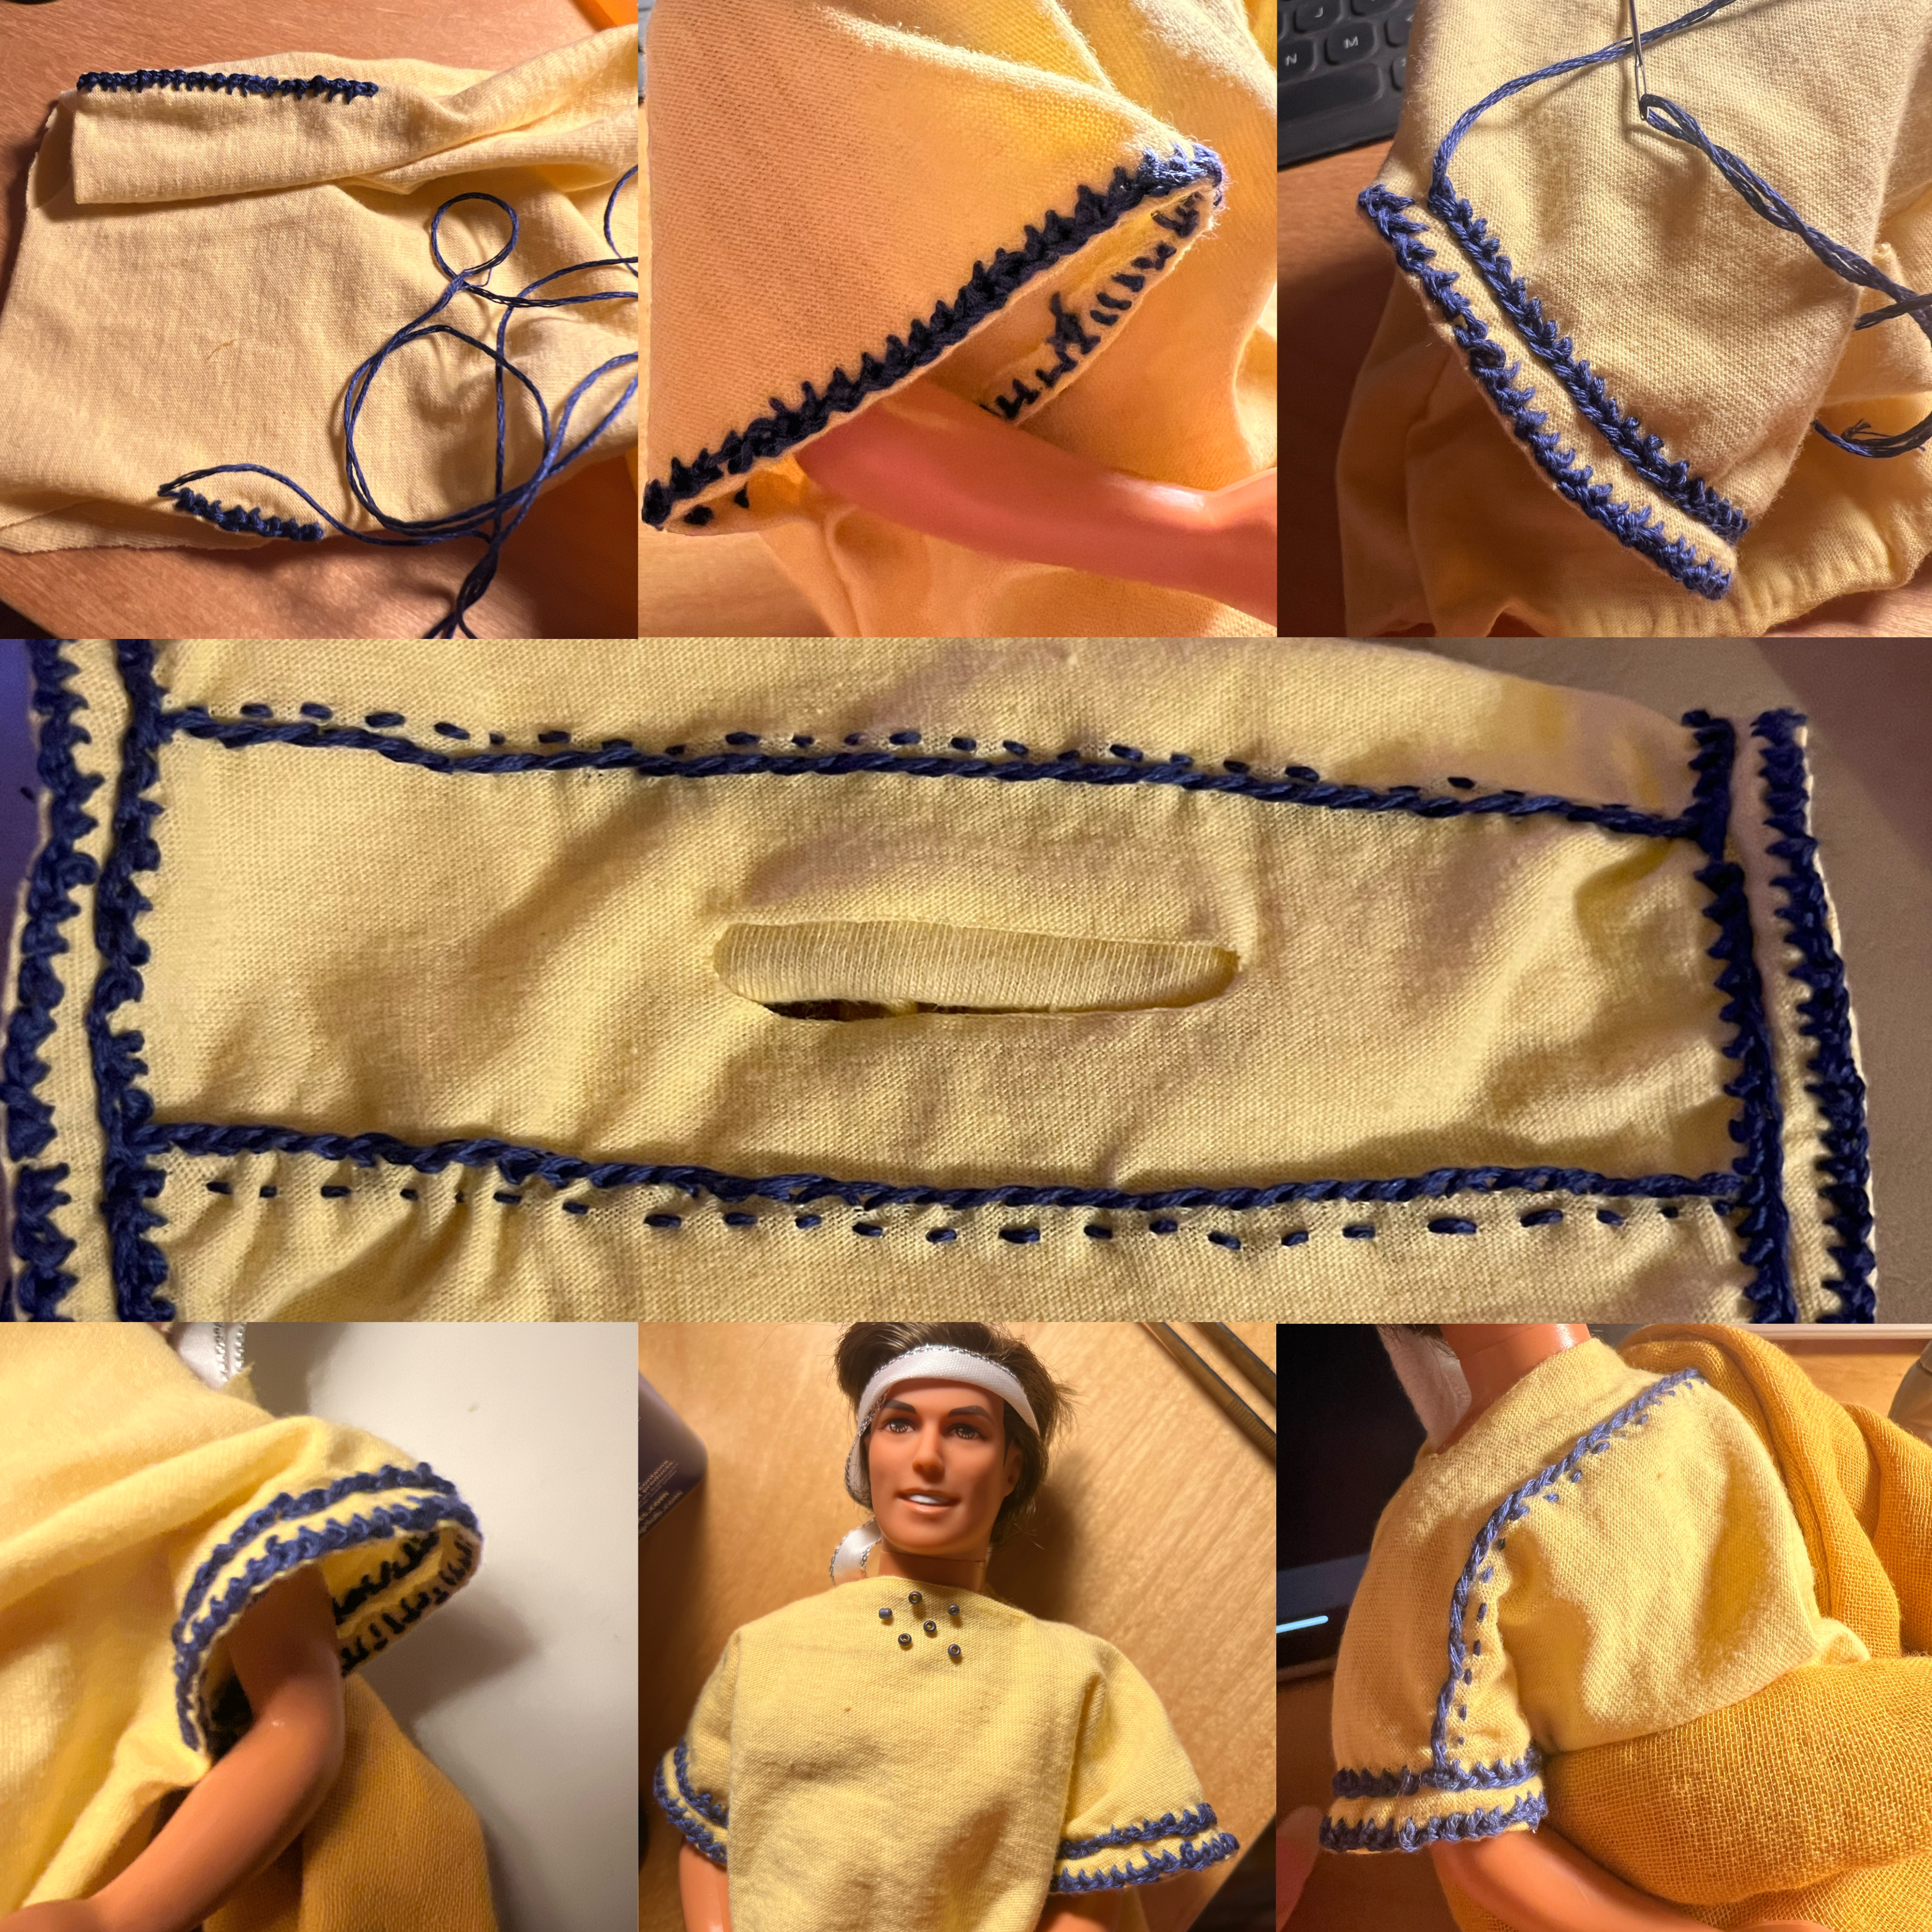
Anyways, the overall total time of embroidering (plus blue beads) took over 15+ hours, with one sitting being 11 hours long!! Yeesh!! And yes I did suffer a bad hand cramp after all this.
My beading plan was very simple yet complex, I had to keep my focus and not stray away from my imaginary guidelines.
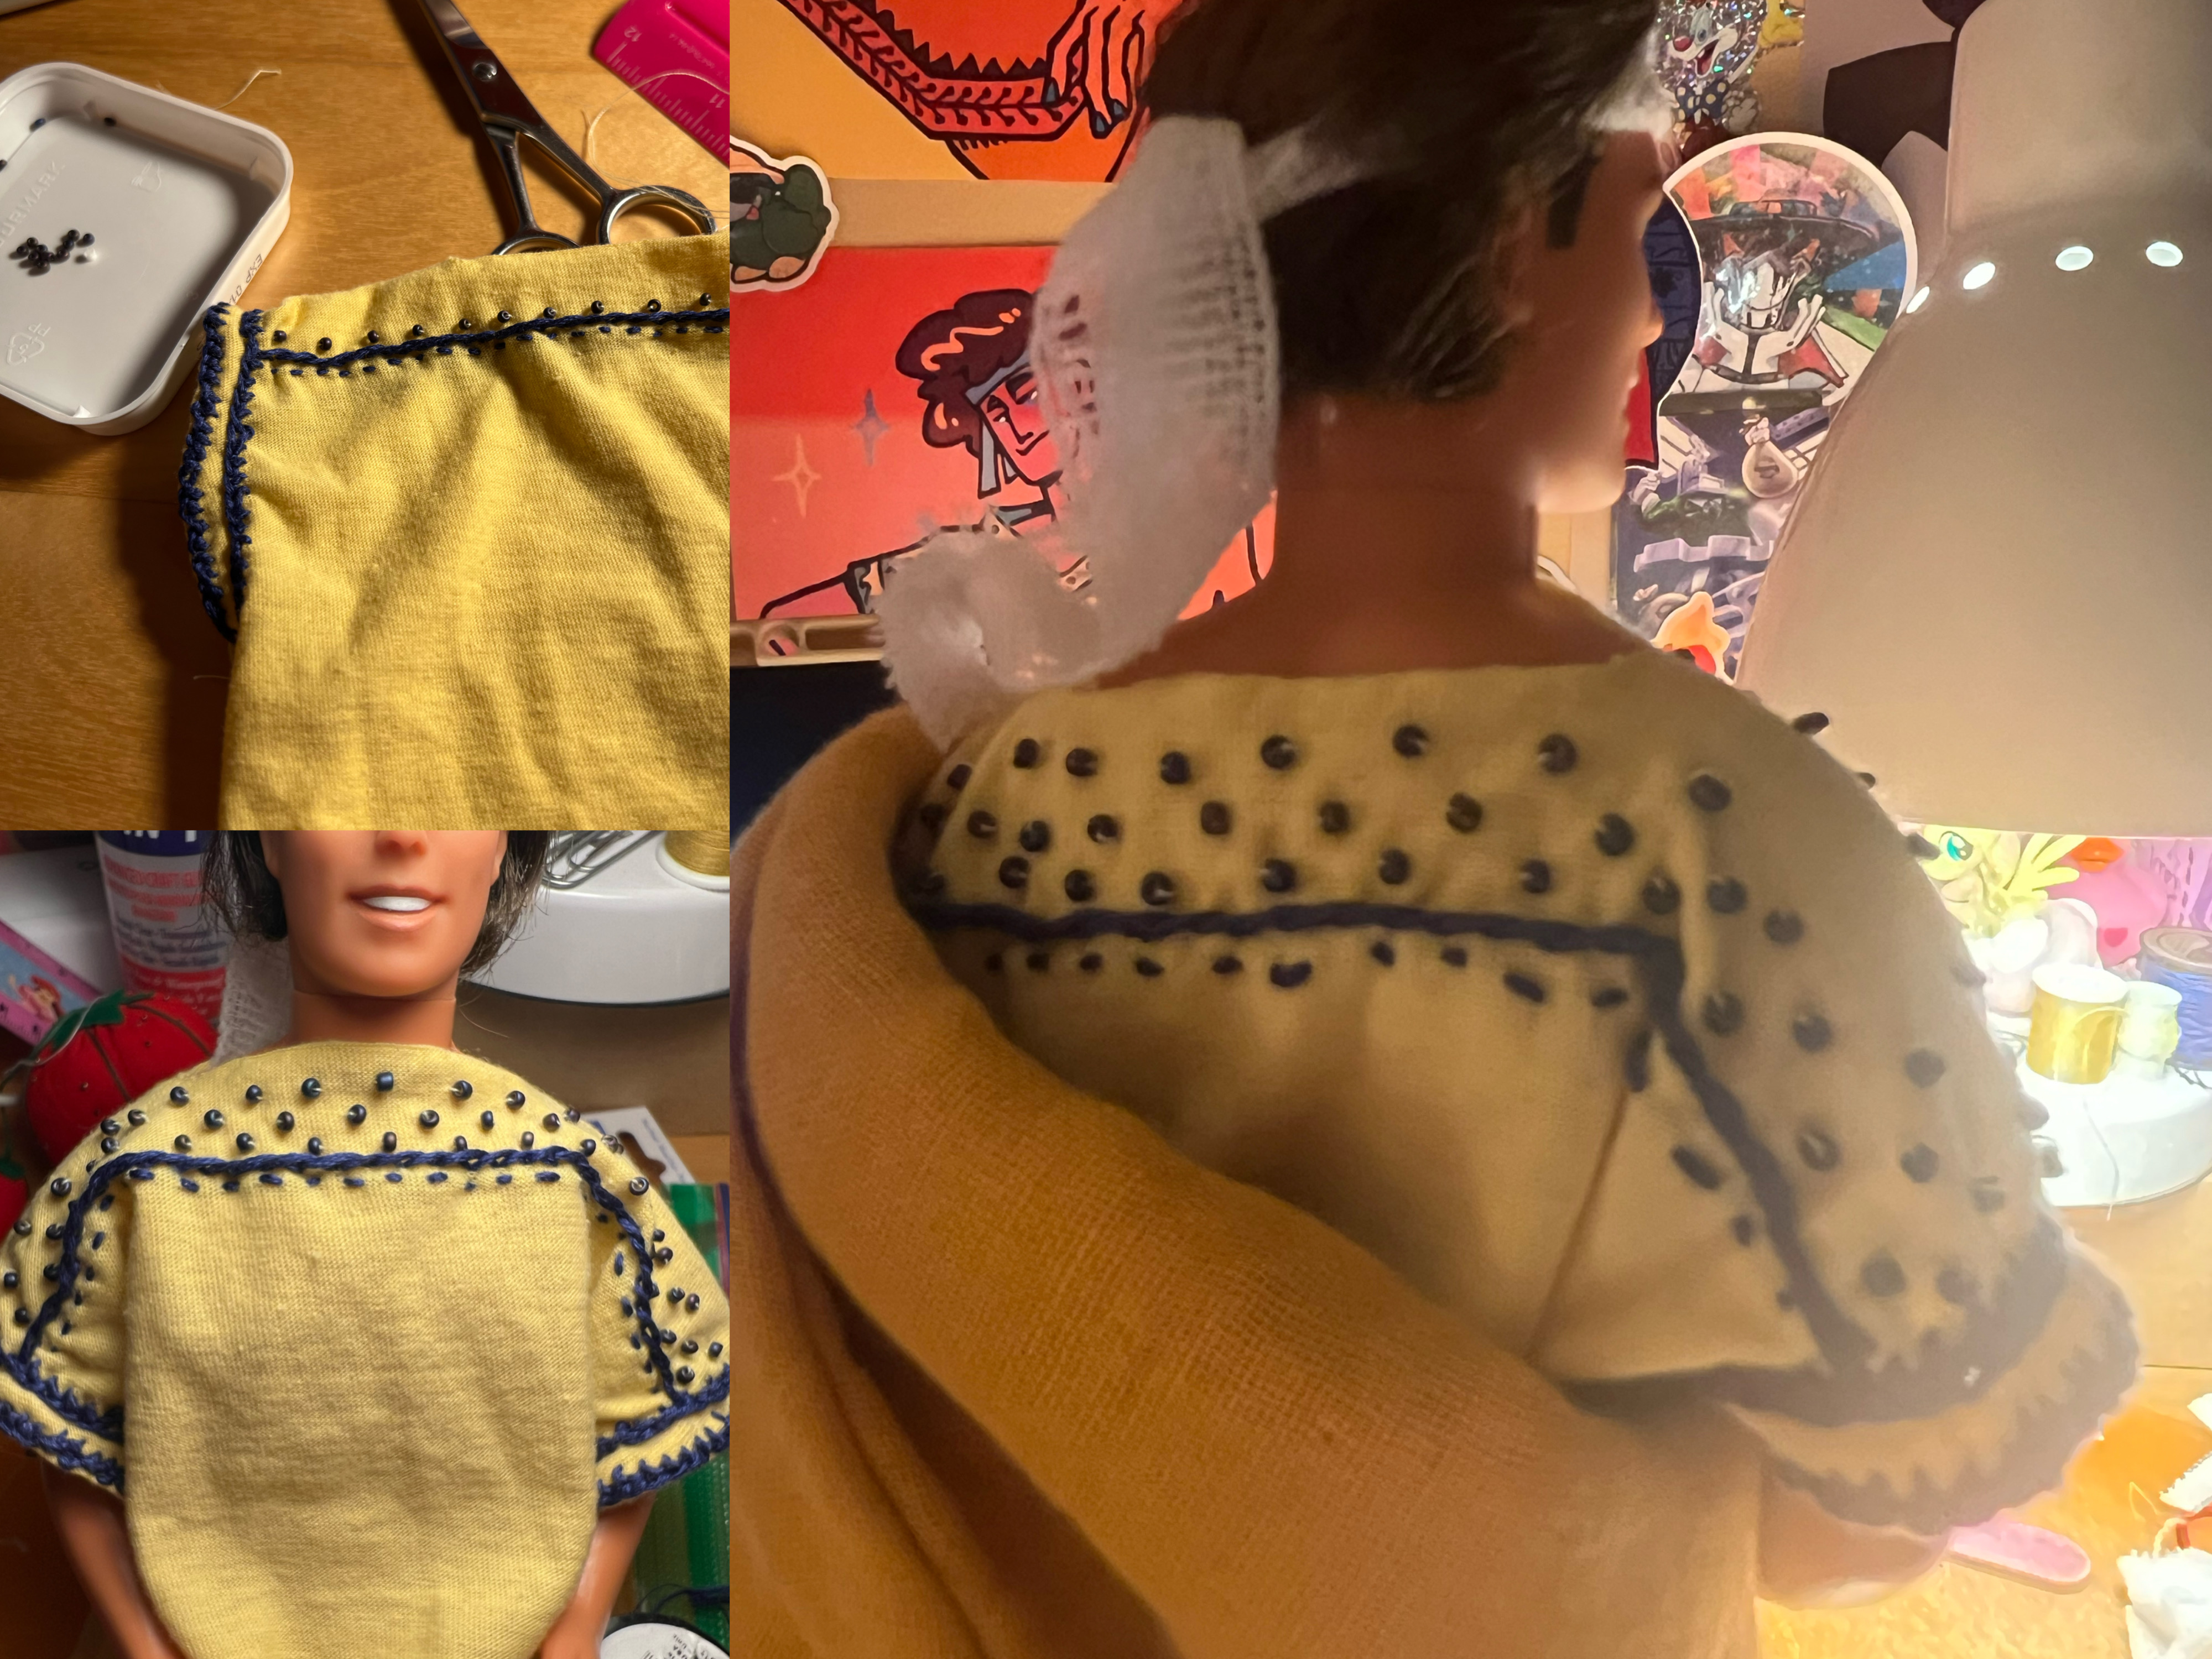
I sewed it in a weaving pattern: up, insert bead, down, up, insert bead…. And so on, I also went back a stitch ever so often to make it durable. As seen in a earlier photo, I also planned out the rows of beads before I embroidered the chest line, which greatly helped the planning and end look of the arrangement. In the end, I was very pleased with the look and it boosted my hype for my creation!
Now you may be wondering, attau this doll barely has any articulation like the new dolls! That's another thing I tested midway thru the project. They did, in fact, make super articulated dolls for this body type back in the late 90s (what entrepreneurs mattel used to be)... So I bought one to try it out! Sadly, it didn't look right and feel to me, so I scrapped the idea and kept the 70s Superstar Bend N Snap body that this doll already had. Maybe I'll revisit it if I find a more stiff jointed Rollerblading Ken again.

However, I was still stumped on how I would go about the rosettes; or as Kallias would call it “rodakas”. Nothing on the online market looked like what I needed and I needed this to be as accurate as possible. Somewhere along the line I gave up looking and tried a different approach, making it myself. On the actual outfit, Kallias’ rosettes are a semi-clear dark red, kinda like sunglasses shades but more red, so I bought an oven bake transparent “wine red” (fitting name) clay from my local craft store. I created a stencil of the rosette from paper and used that as my ‘cookie cutter’, using simple clay tools to bring the whole thing together. I had never made clay beads before so they’re a little wonky, but they sold me!! I even made some extra in case one falls off mysteriously one day.

Next came the planning for the bottom half of the chiton. This is where I broke out my ruler and made makes with pencils on the fabric, anything out of line would look terribly wonky! I actually did end up with a mis-measure but it doesn’t bother me much, you can barely notice it on him!! Too late to turn back too.
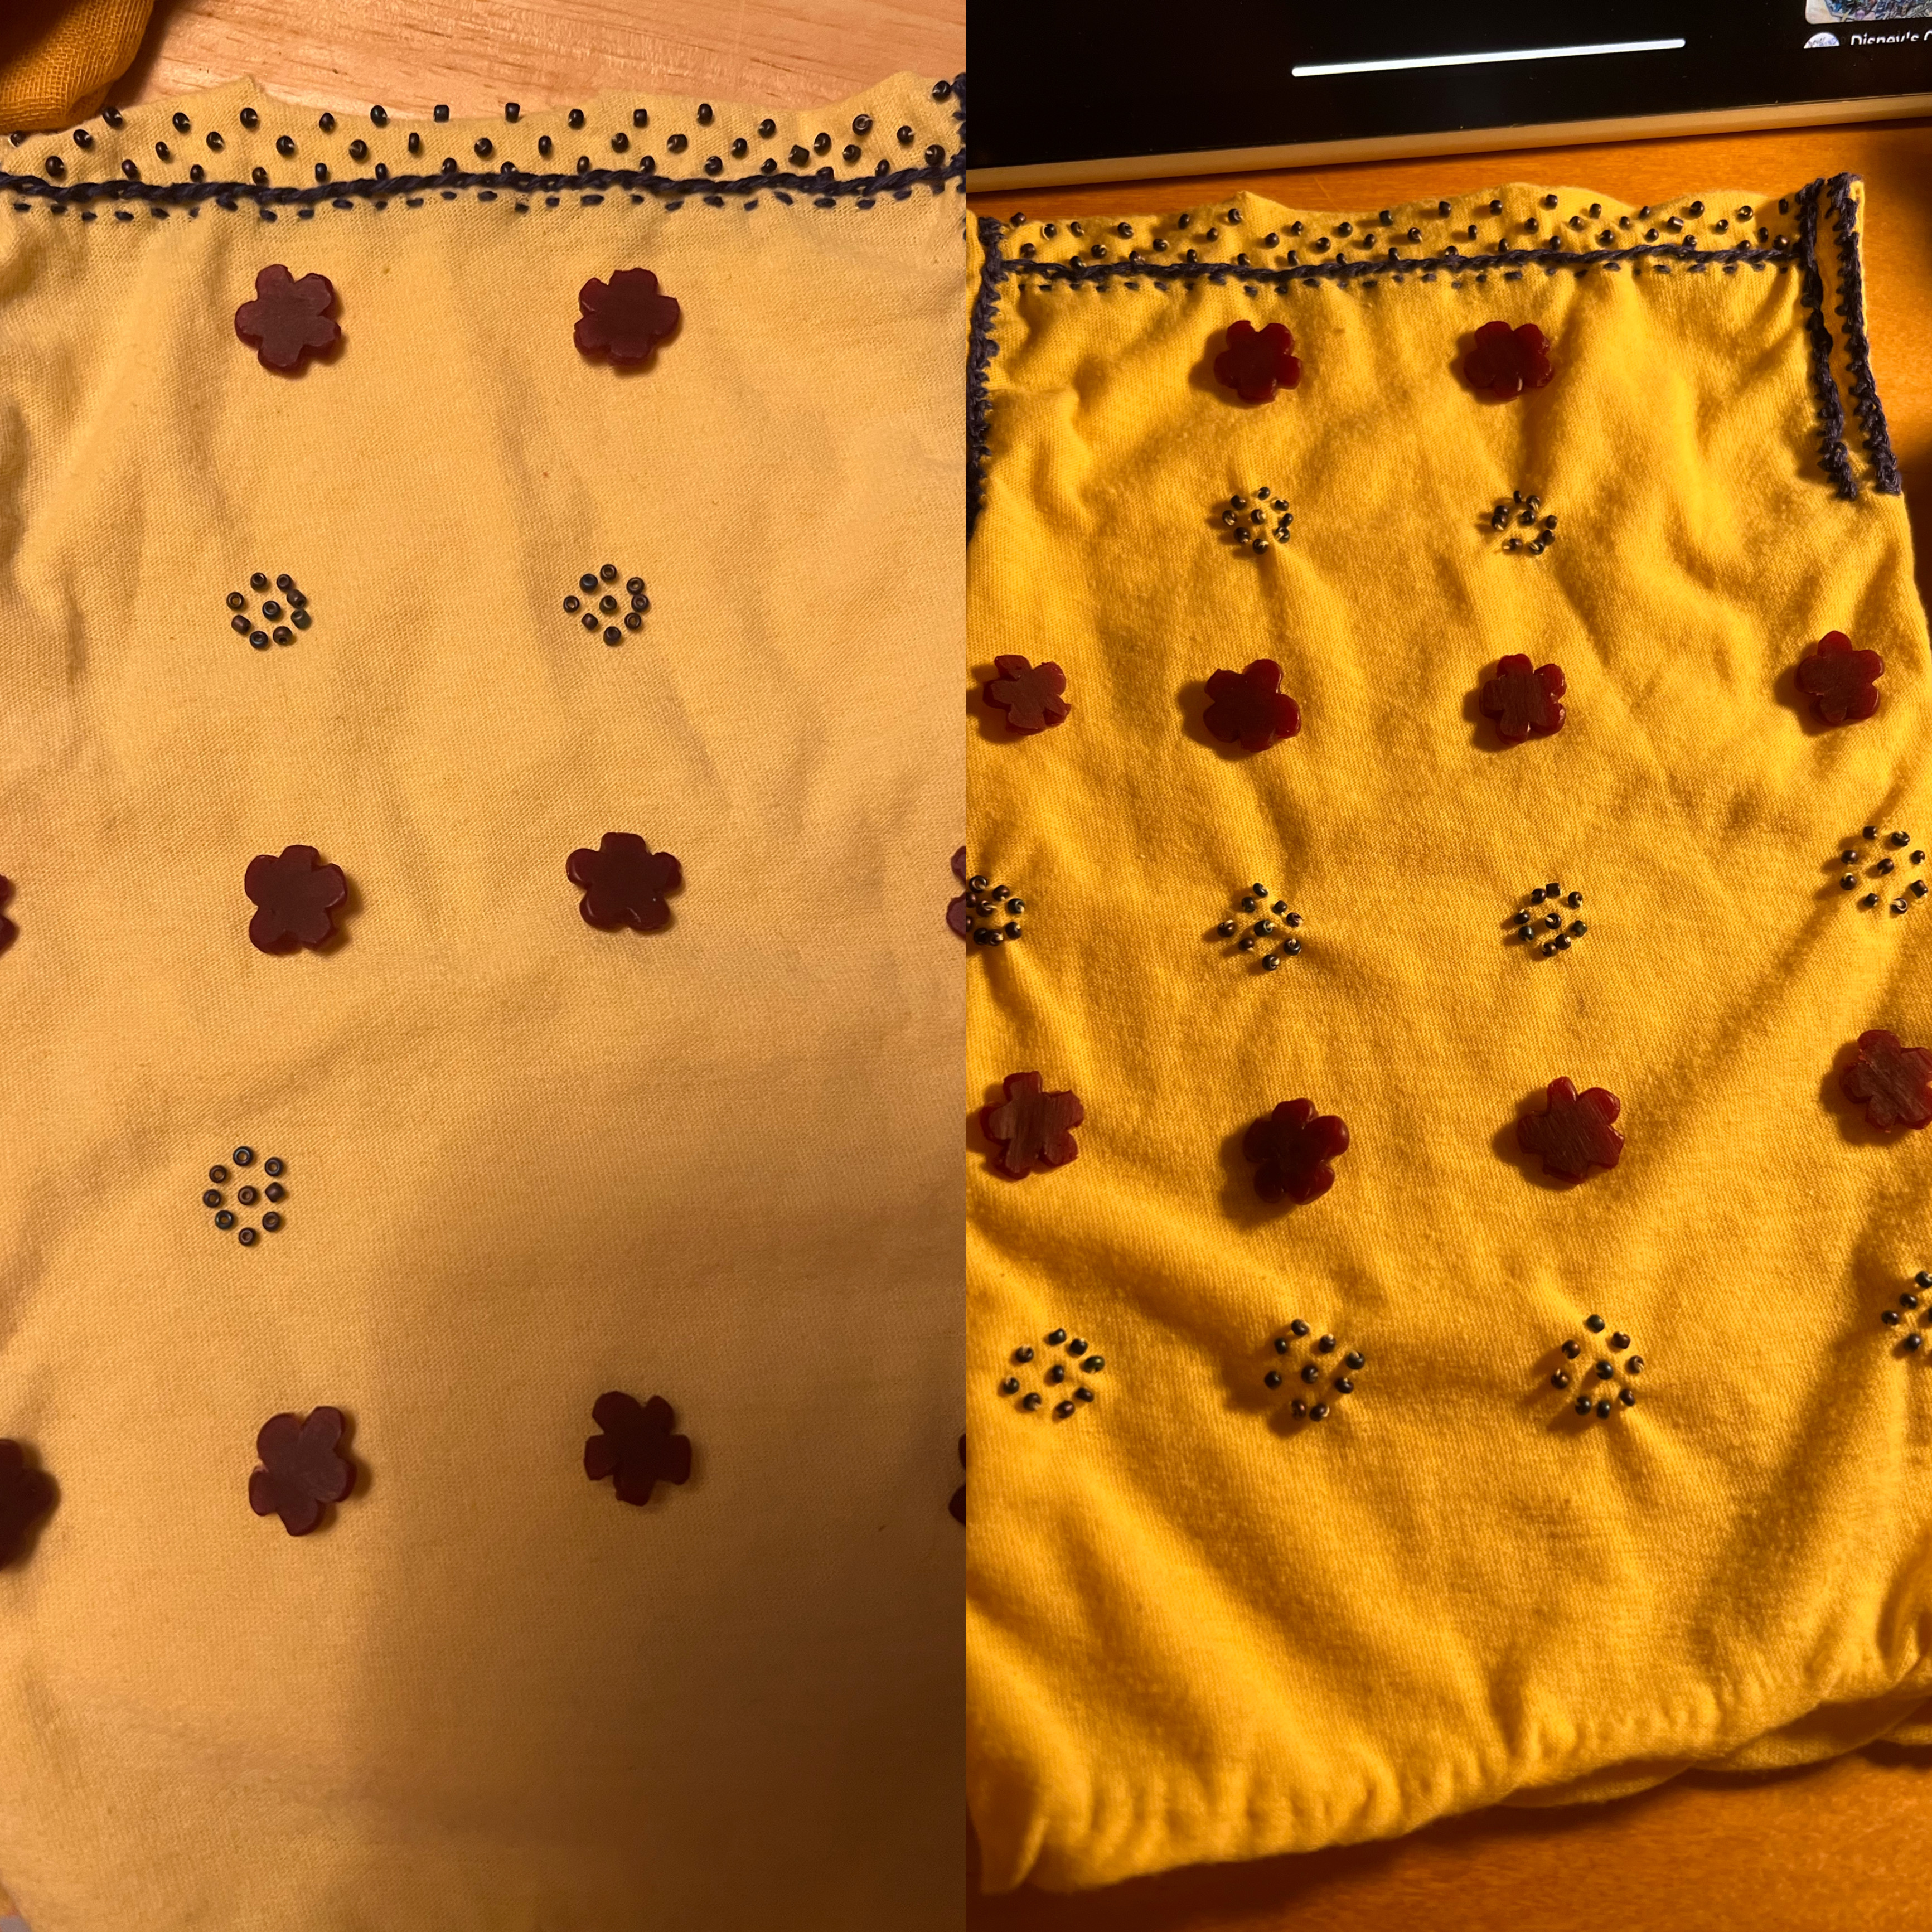
The circular beads were sewn just like the matching top ones but in a more ‘secured’ fashion… aka me going around and back every other stitch like a mad man.
I did not put any on the back as it is in canon (also it would be quite uncomfortable to sit too). So I continued onto the chiton.
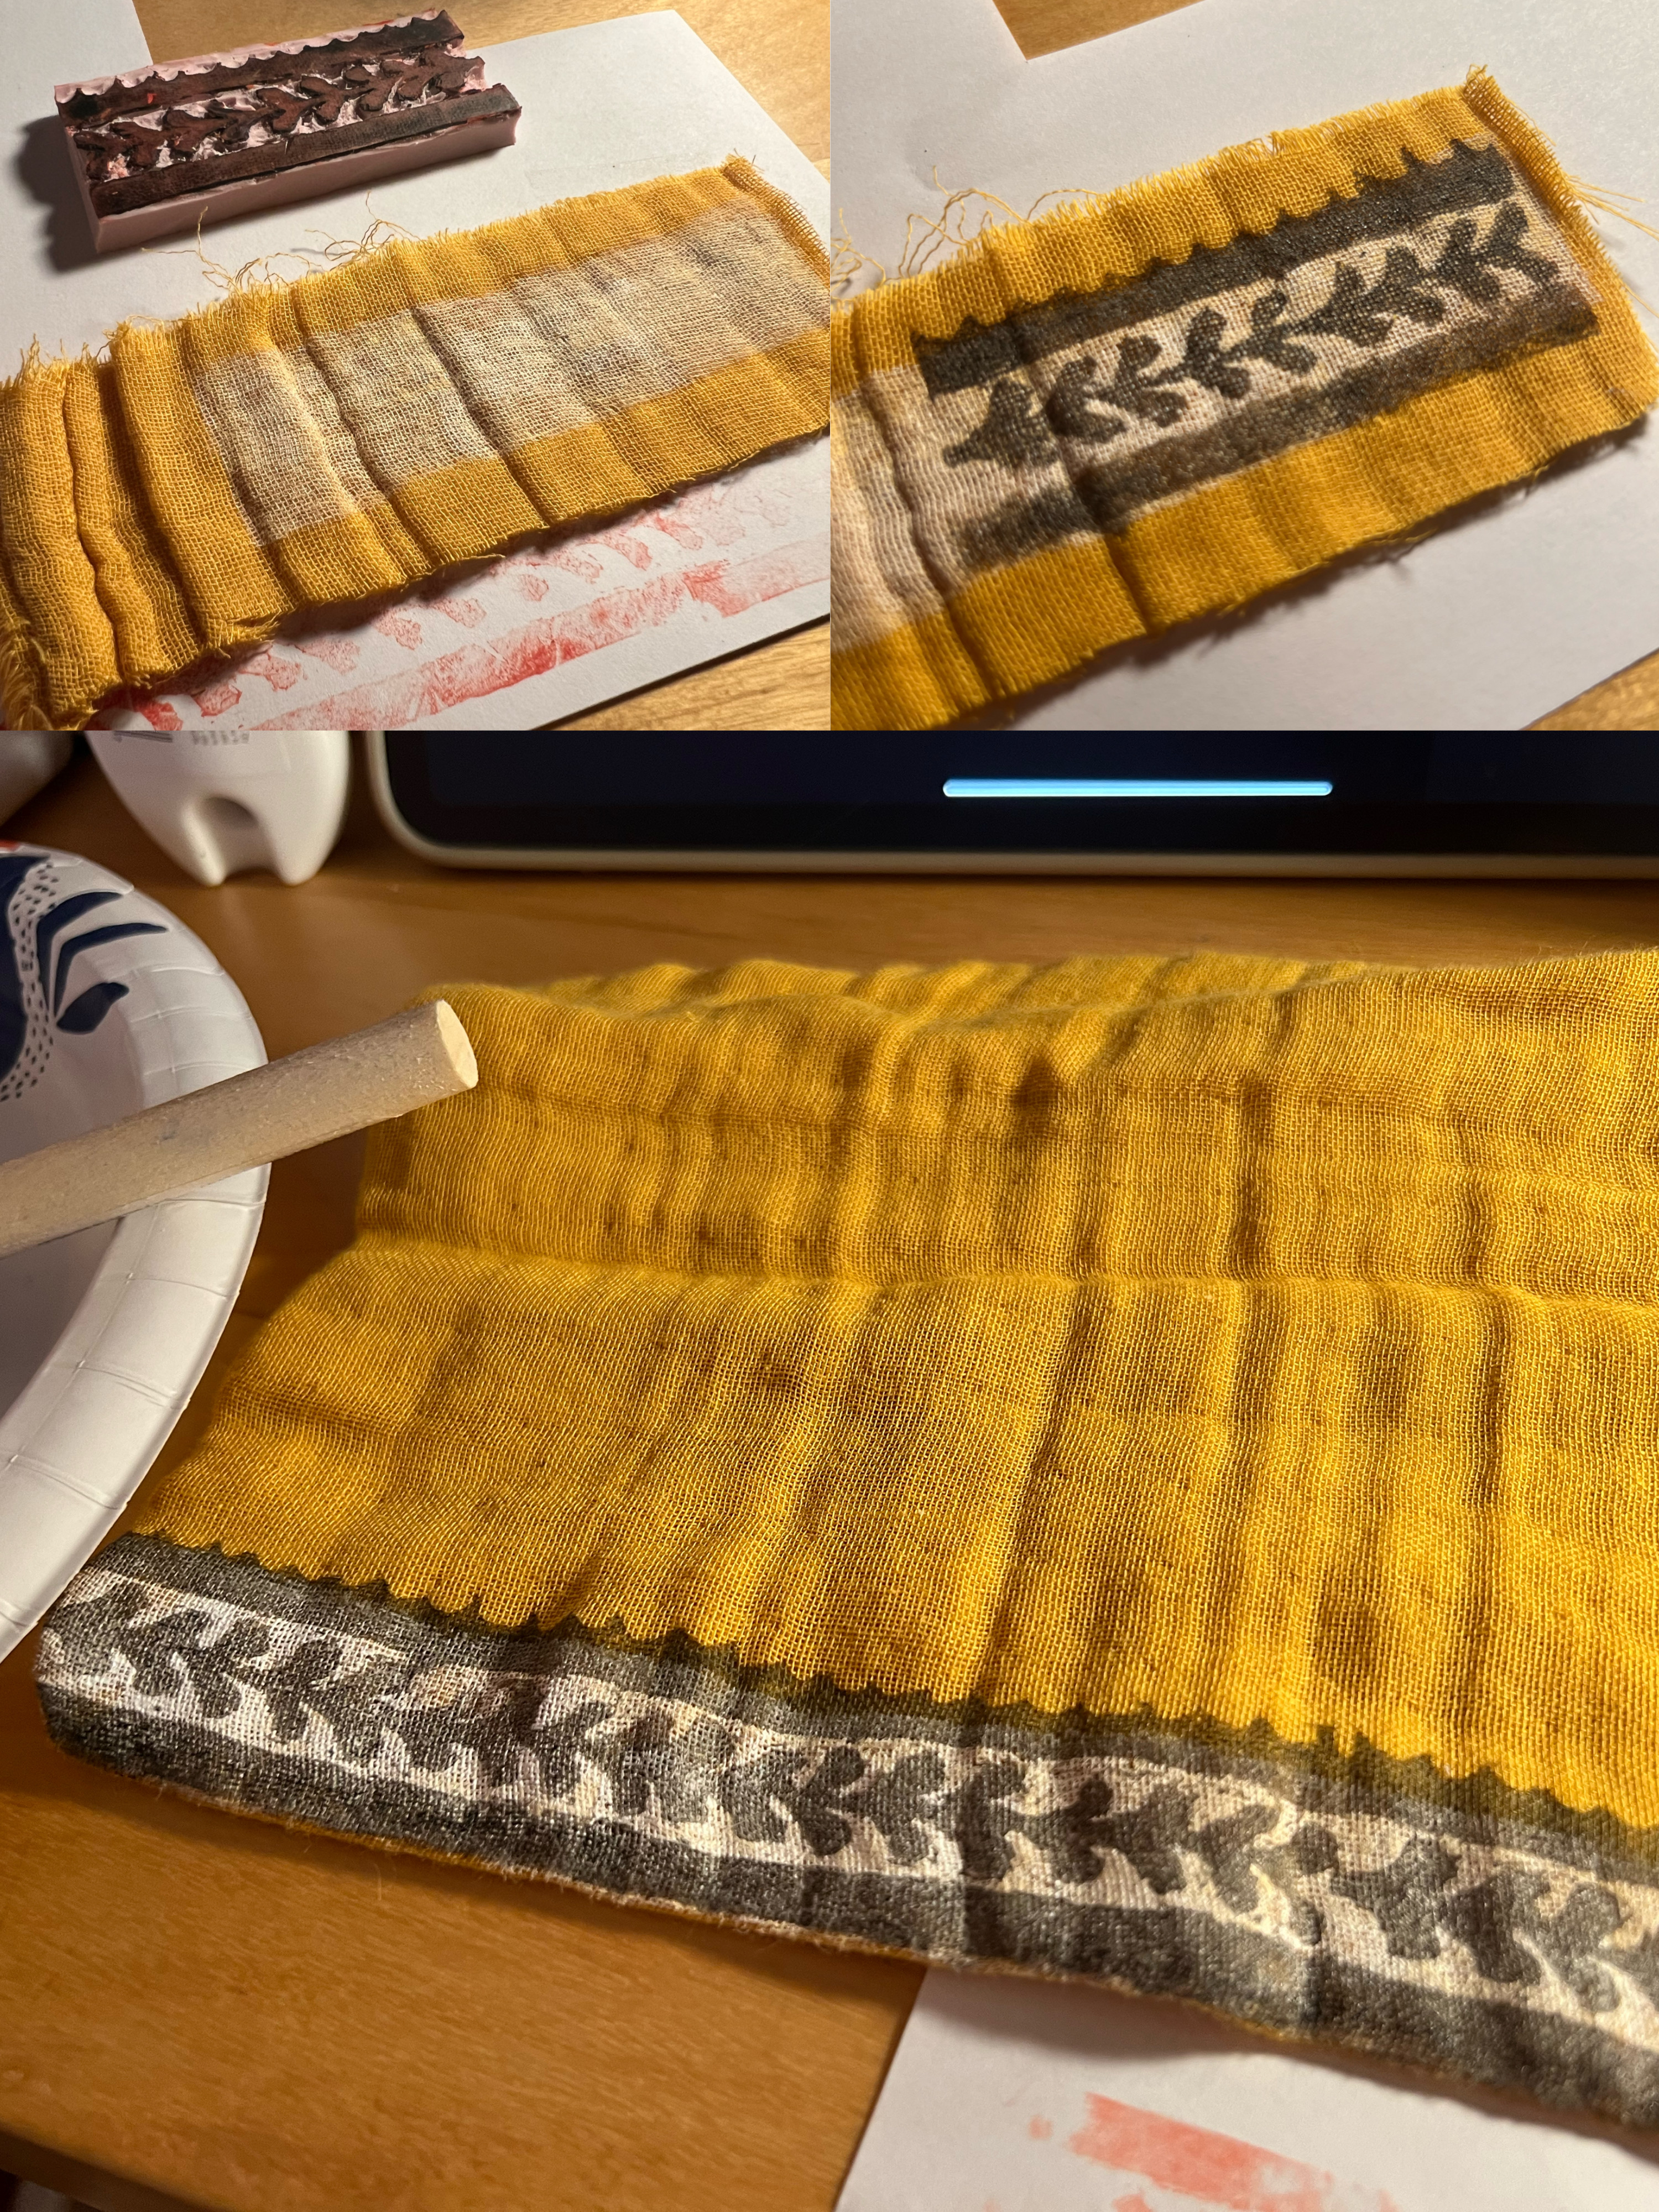
The himation was an interesting problem, just like the beads, the laurel pattern that wraps around Kallias’ himation was unique and nothing on the market for ribbons matched him, so I resorted to making it by hand. I decided to go with a rubber stamp method, similar to the Indian Block-Printing technique. I used a digitally made reference of Kallias’ himation laurels and printed it out, rubbing the fresh ink on the rubber to ‘transfer’ it, neat stuff to do in real time! I then carved out the ‘pink’ remains between the inked parts and ended up with a pretty nice looking stamp, yet a little messy since it was so complex. I’m also pretty sure that this was the event that made my hand cramp, it was hard meticulous work!!
For the himation itself, I tested it out on a swatch to see how I should go about making the paint pattern. I created a plan of adding a white strip first, letting it dry, and then going over it with the black stamp. I had to align it ever so perfectly too, so I intensely focused on this part; no tv either. In the end, I came up with something that pleased me and I finished off some iffy spots with a small paintbrush. I also carefully ironed it to set the paint, but I’m not sure if I did it enough; nor do I wanna risk the chance of overdoing it!
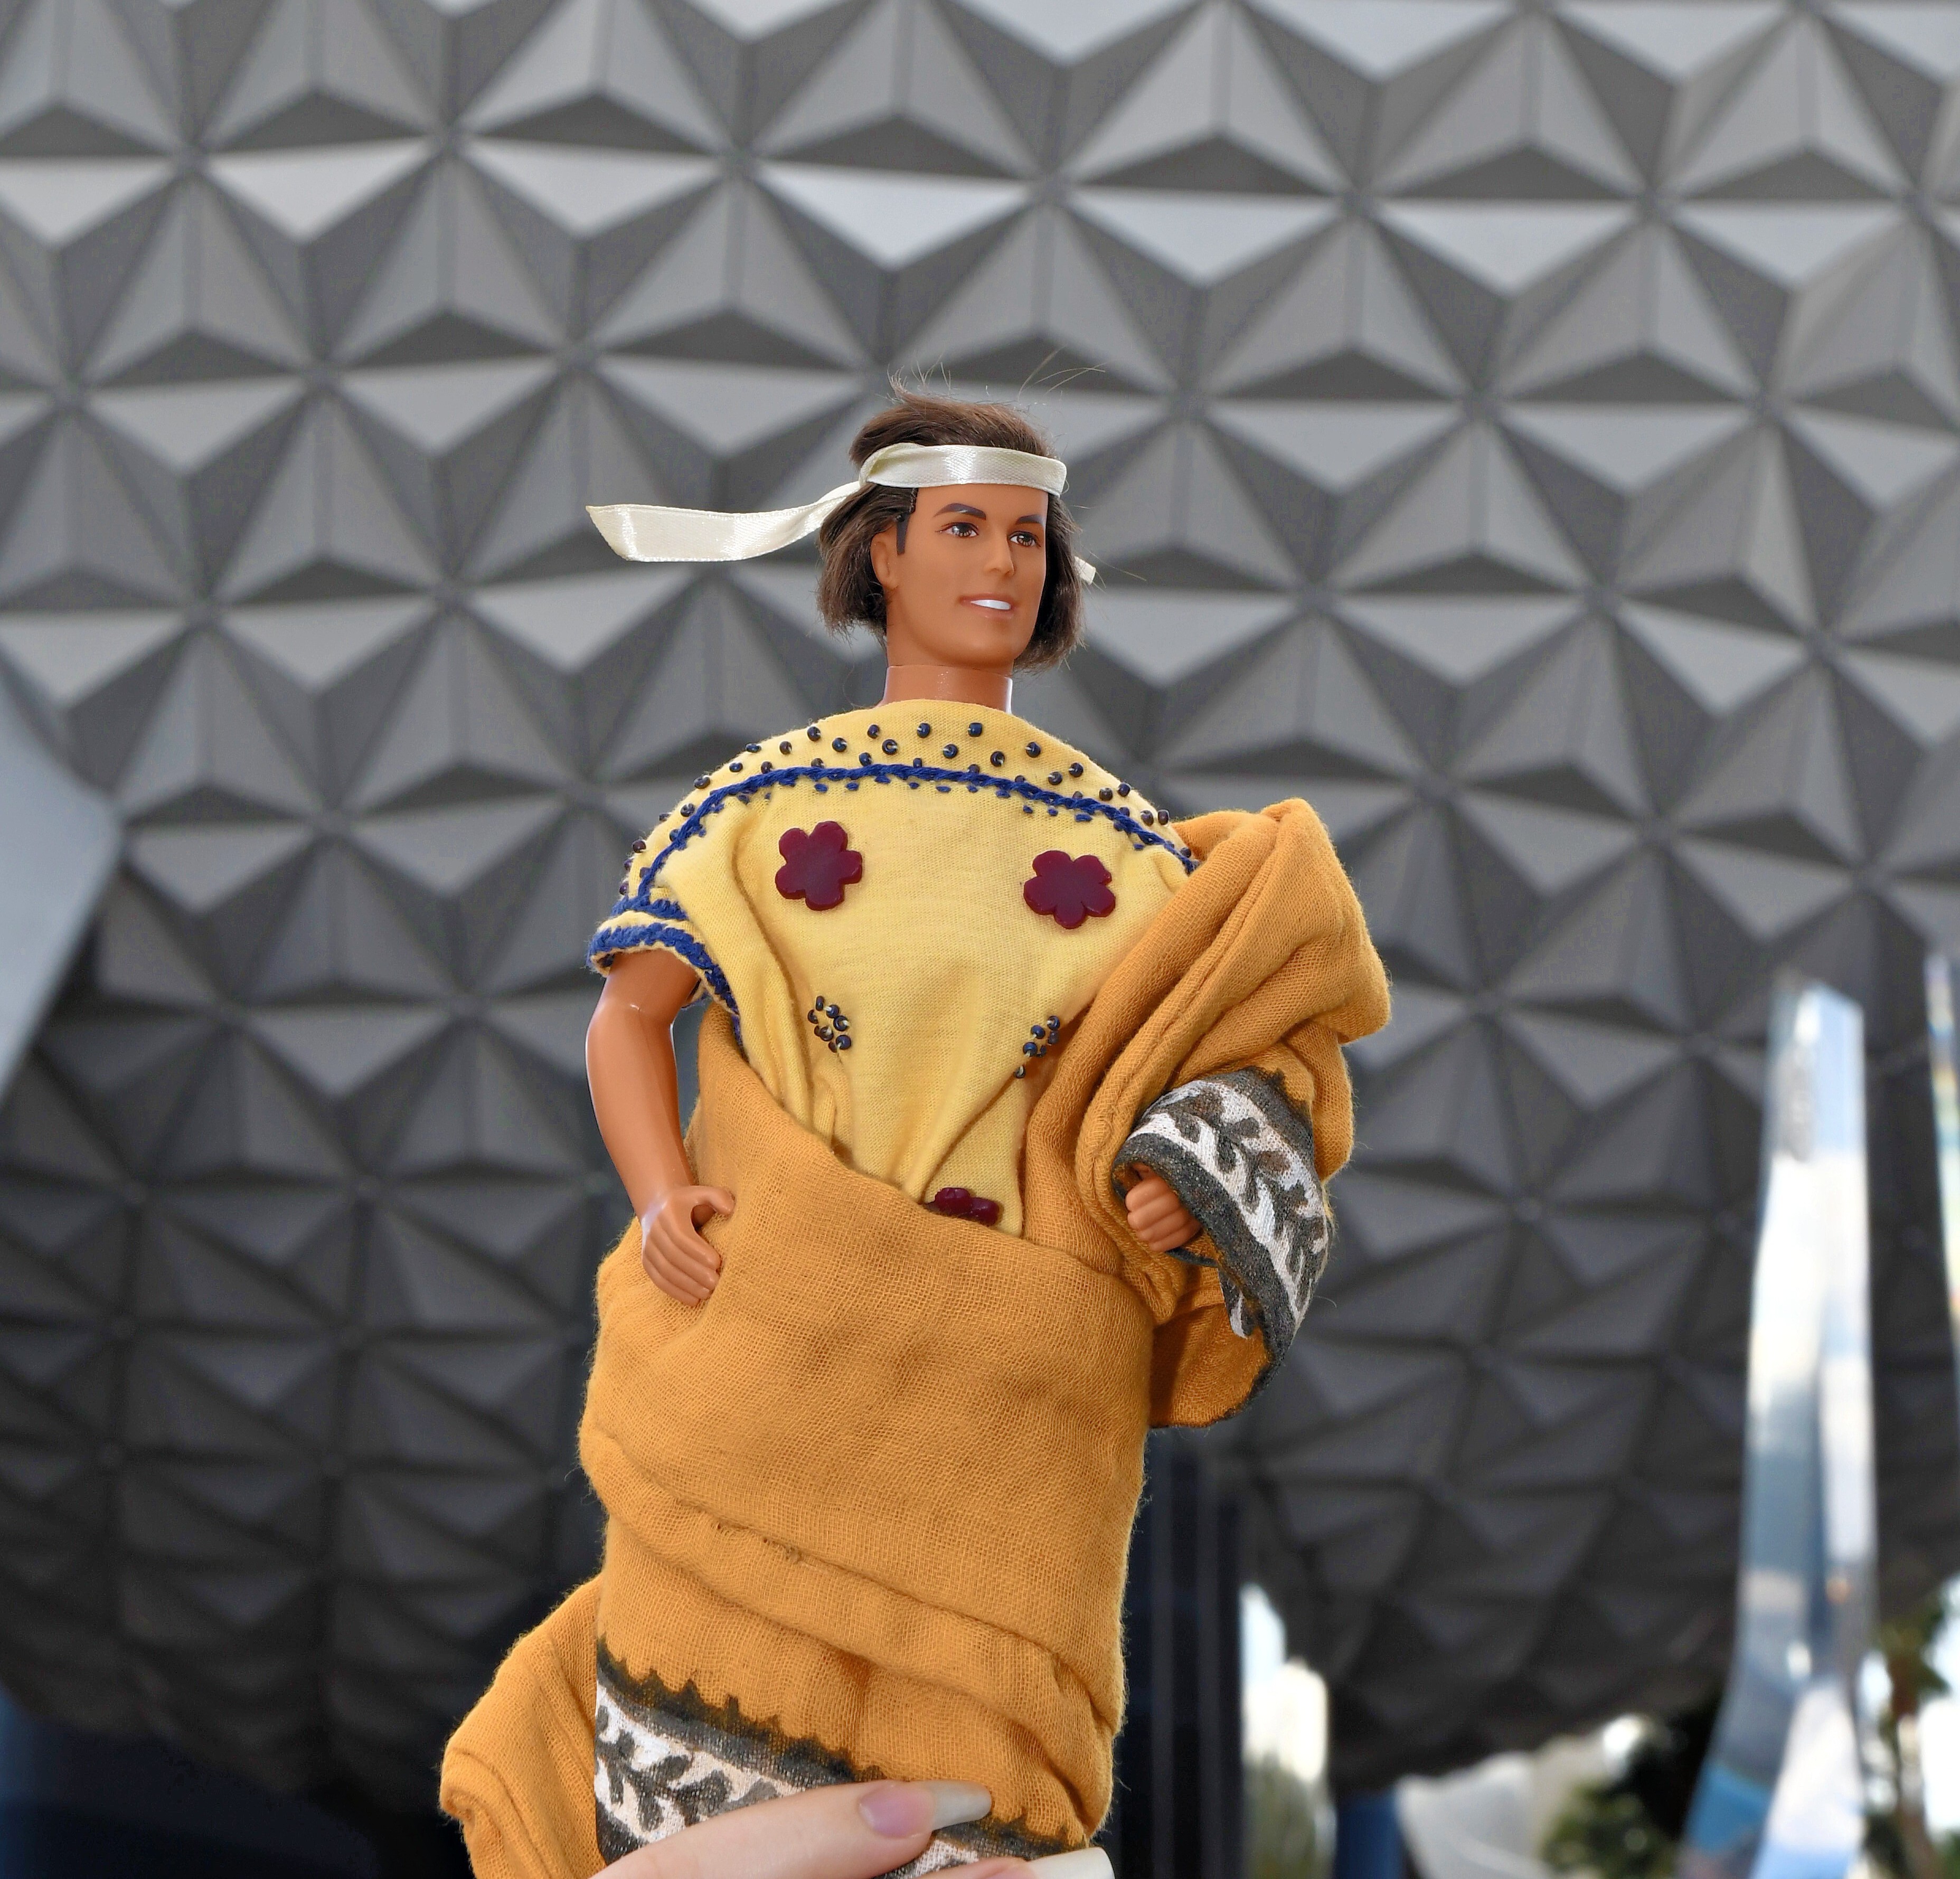
For the headband, I bounced around with different materials to find the perfect one for me, as you can see in some pictures. But I ended up using a small, folded in half satin ribbon that is double knotted in the back. It comes off sometimes, like when I was standing underneath Spaceship Earth and it got blown off to a corner next to the left bathrooms, but overall pretty sturdy with gentle handling! I’m always open to finding a better ribbon for his headband though….
And so that concludes my making of Kallias doll! He is my pride and joy, probably over 20+ hours of work went into him alone; so he’s definitely coming with me during an emergency… I see him as a true testament to my dedication to these Greeks and most importantly to my husband (Kallias)!!! (I do also want to make the others, currently working on finding matching dolls for them tho)
So far I’ve been able to take him to Epcot once and got to bring him onto Spaceship Earth; yes, I did get looks for it.
I hope to bring him along many more times! Perhaps even be able to take him closer to his big twin brother someday….? Only time will tell…..Thank you for reading!!